PlayZoneMasti Play free
Puzzles guide · updated 10 November 2026

How to solve a Rubik's Cube: the beginner method

Seven simple steps, one layer at a time. Each step shows what to look for, what to do and the exact moves, with pictures. Most people solve their first cube within an hour or two of practice.

MethodBeginner, layer by layer
Steps7
Moves to remember6 short sequences
Time to learn1 to 2 hours
Solve timeAbout 2 to 5 minutes at first
You needA standard 3 x 3 cube

First, know your cube

A 3 x 3 cube has three kinds of pieces. Knowing them is the key to the whole method:
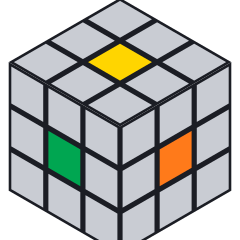
The six centre pieces, one colour each; they never move from their side.
The twelve edge pieces, two colours each.
The eight corner pieces, three colours each.
  • Centres (6) have one colour and never move relative to each other. The centre tells you the colour of that whole side. White is opposite yellow, green opposite blue, red opposite orange.
  • Edges (12) have two colours.
  • Corners (8) have three colours.

So you never "make a white side" sticker by sticker: you put each white piece where it belongs.
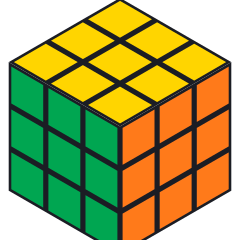
How to hold it and read the moves

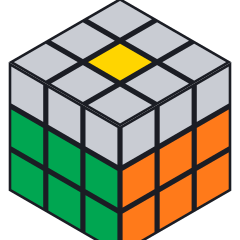
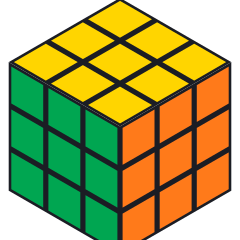
Hold the cube with yellow on top and green in front; orange is on the right.

From step 2 to the end, hold the cube with yellow on top and keep it that way. The face pointing at you is the front. Each letter is a quarter turn of one face, clockwise as if you were looking straight at that face:
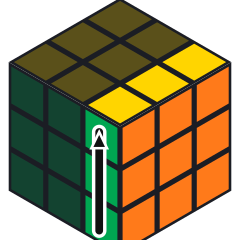
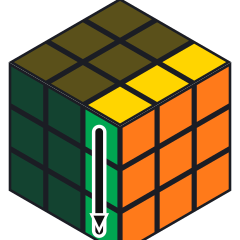
  • R right, L left, U up (top), D down (bottom), F front. (B, the back, is not needed in this method.)
  • A letter with an apostrophe, like R' (say "R prime"), is the same face turned anticlockwise.
  • A 2, like U2, means turn that face twice (a half turn).
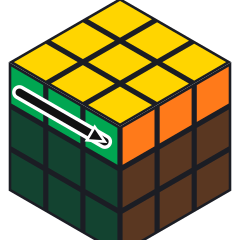
The R move: the highlighted layer turns the way the arrow points.
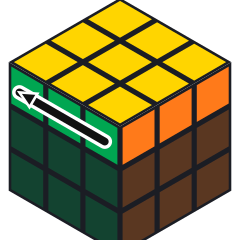
The R' move: the highlighted layer turns the way the arrow points.
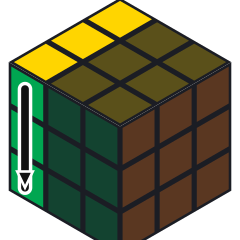
The L move: the highlighted layer turns the way the arrow points.
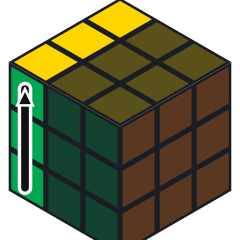
The L' move: the highlighted layer turns the way the arrow points.
The U move: the highlighted layer turns the way the arrow points.
The U' move: the highlighted layer turns the way the arrow points.
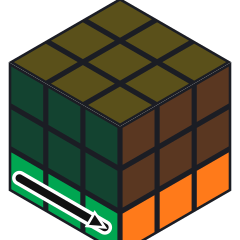
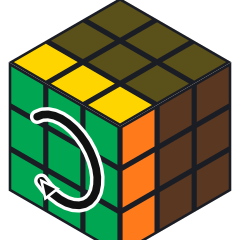
The D move: the highlighted layer turns the way the arrow points.
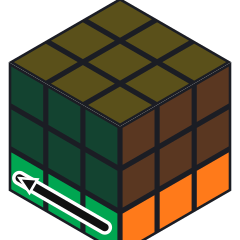
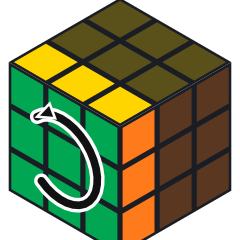
The D' move: the highlighted layer turns the way the arrow points.
The F move: the highlighted layer turns the way the arrow points.
The F' move: the highlighted layer turns the way the arrow points.

Tip: for R the right side comes up towards you; for L the left side goes down. Practise each move a few times before you start.

Step 1: The white cross (with the daisy)

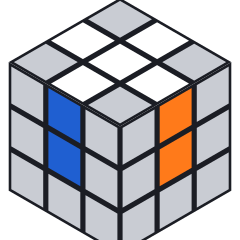
Goal: a white cross on the bottom, with each white edge's other colour matching the centre beside it.

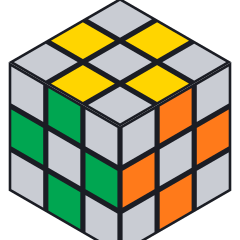
1a. Make a daisy. With yellow on top, bring the four white edges up around the yellow centre, white facing up, like petals. Do it any way you like; if a spot is already taken by a petal, turn the top (U) to move it out of the way first.
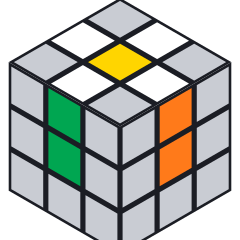
The daisy: four white edges around the yellow centre on top.

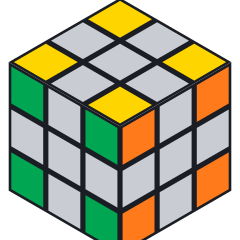
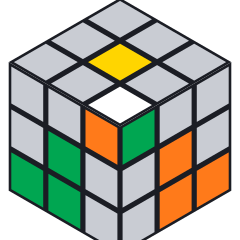
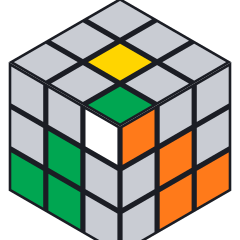
1b. Send each petal down. Turn the top (U) until a petal's side colour matches the centre below it. Then turn that face twice (for the front, F2). The white edge goes to the bottom in the right place. Repeat for all four petals.
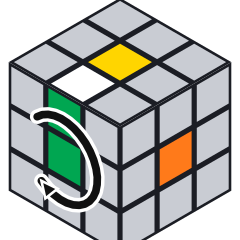
The front petal matches the green centre below it: turn the front face twice (F2).
The white cross (cube turned over to show it), each edge matching its side centre.

Look for: the side colour of each petal, not the white. Common mistake: turning a face twice before the petal matches its centre.

Step 2: The white corners (first layer)

Goal: the whole white side done, with the side colours of the bottom row matching their centres.
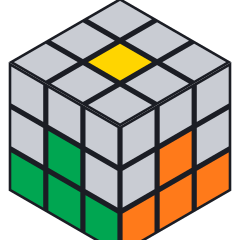
Goal: the whole white layer solved, sides matching their centres.

Find a white corner in the top layer. Look at its two other colours and turn the top (U) until the corner sits right above the place it belongs (between those two centres). Hold the cube so that place is at the front right, bottom. Then repeat this until the corner drops in correctly:

RUR'U'
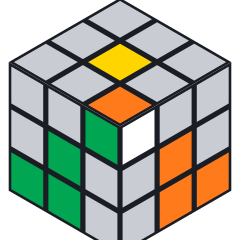
White corner above its place: R U R' U' 1 time.
White corner above its place: R U R' U' 3 times.
White corner above its place: R U R' U' 5 times.
  • White facing right: 1 time.
  • White facing up: 3 times.
  • White facing front: 5 times.

Corner stuck in the bottom in the wrong place or twisted? Hold it at the front right, bottom and do R U R' U' once: it comes up to the top layer, then place it as above.

Good to know: doing R U R' U' six times brings the cube back to where it started, so you can never really break anything with it.

Step 3: The middle layer edges

Goal: the first two layers complete.

Goal: the first two layers solved.

Keep white on the bottom. Find an edge in the top layer with no yellow on it. Turn the top (U) until its front colour matches the front centre (like a T shape). The top colour of that edge tells you where it goes:

It goes to the right (its top colour matches the right centre):

URU'R'U'F'UF
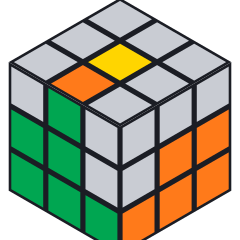
The edge belongs between the front and the right side.

It goes to the left (its top colour matches the left centre):

U'L'ULUFU'F'
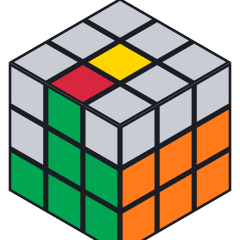
The edge belongs between the front and the left side.

An edge stuck in the middle layer, in the wrong place or flipped? Hold it at the front right and do the "right" sequence once with any top edge: it pops up to the top, then insert it properly.

Step 4: The yellow cross

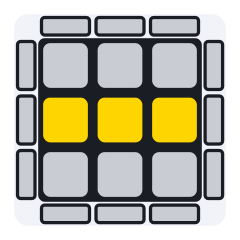
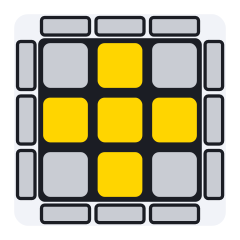
Goal: a yellow cross on top. Ignore the corners for now. You will see one of these shapes made by the yellow edges:
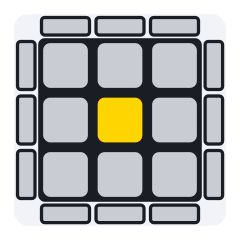
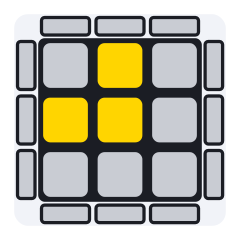
Dot: no yellow edges up.
L shape, held at the back and left.
Line, held left to right.
Goal: a yellow cross on top.

FRUR'U'F'

  • Dot (no yellow edges up): do the moves once, then look again.
  • L shape: turn the top so the L points to the back and left (as in the picture), then do the moves.
  • Line: turn the top so the line goes left to right, then do the moves. You now have the cross.

Common mistake: holding the L or the line the wrong way round. Check the picture before every go.

Step 5: Match the yellow edges

Goal: each yellow edge's side colour matches its centre. Turn the top (U) until at least two edges match.
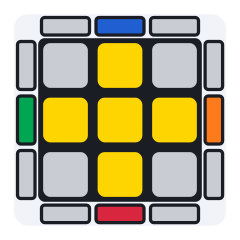
Two neighbouring edges match their centres: hold them at the back and on the right.
  • Two neighbouring edges match: turn the whole cube (keep yellow on top) so they are at the back and on the right, then do the moves below once.
  • Two opposite edges match (front and back, or left and right): do the moves once from any side, then you will have the neighbouring case.

RUR'URU2R'U

Step 6: Put the yellow corners in place

Goal: every yellow corner in its correct spot (between the right three colours). It may still be twisted; that is fine for now.

Find a corner that is already in its correct spot. Turn the whole cube so it is at the front right, then do the moves once or twice until all four corners are in place. If no corner is in place, do the moves once from anywhere first.
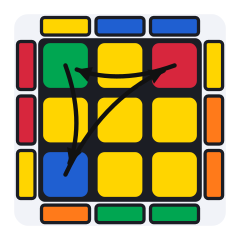
One corner is in its place (front right); the other three move round.

URU'L'UR'U'L

Step 7: Twist the yellow corners (finish!)

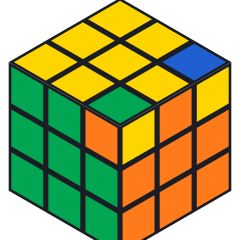
Goal: yellow on top everywhere, the cube solved. This is the step where people panic, so read it twice:

  1. Hold the cube with yellow on top and an unsolved corner at the front right, top.
  2. Repeat the moves below until that corner's yellow faces up (2 or 4 times). The lower layers will look messed up: don't worry, keep going.
  3. Now turn only the top (U) to bring the next unsolved corner to the front right. Do not turn the whole cube.
  4. Repeat for every unsolved corner. When the last one is done, the bottom layers fix themselves; turn the top once more to line it up.

R'D'RD

A corner with yellow facing the side: turn the cube so it is at the front right, then R' D' R D until yellow is on top.
A solved cube.
A solved cube.

Common mistake: turning the whole cube in the middle of this step. Only the top may turn between corners.

What next?

  • Solve it a few times with this page open, then try from memory: the six sequences are short and come quickly.
  • Learn finger tricks for R, U and their primes to get faster.
  • When you can solve in under two minutes, look at faster methods such as CFOP. Start with this method first.

Rubik's Cube is a trademark of its owner. This guide is independent and not affiliated with or endorsed by the trademark owner.

Rubik's Cube questions

What is the easiest way to solve a Rubik's Cube?

The beginner layer-by-layer method: white cross, white corners, middle edges, yellow cross, yellow edges, yellow corners in place, then twist the yellow corners. It needs only six short move sequences.

How long does it take to learn to solve a Rubik's Cube?

Most beginners solve their first cube within one or two hours of practice with this method, and get under five minutes after a few days.

What does R U R prime U prime mean?

Turn the right face clockwise, the top clockwise, the right face anticlockwise, then the top anticlockwise. Clockwise always means as if you were looking straight at that face.

Why does the cube look scrambled in the last step?

During R' D' R D the bottom layers get mixed up on purpose. Keep going without turning the whole cube; they come back when all the yellow corners are twisted.

Do the colours have to be on the same sides as in the pictures?

No. Only the order around the cube matters: white opposite yellow, and the centres tell you which colour each side becomes. Hold your cube with yellow on top and go by the centres.

More guides

Learn something else

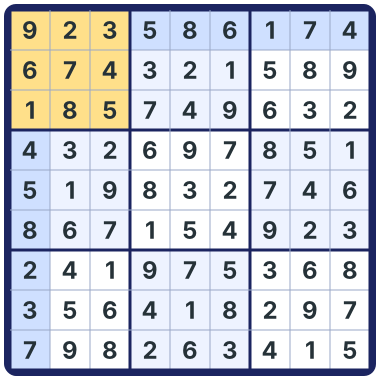
A solved Sudoku grid with a row, a column and a box highlighted
Puzzles

Sudoku

The rules and the two methods that solve every easy puzzle, with picture examples.

Read the guide
Cricket field with the pitch and the 30-yard circle
Sports

Cricket

Overs, runs, wickets, LBW and the three formats, explained simply.

Read the guide
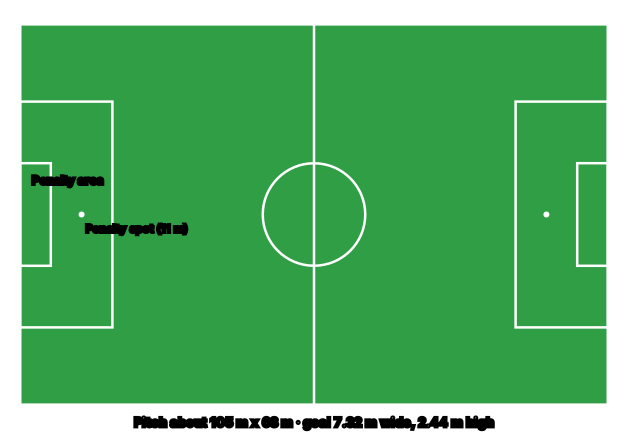
Football pitch with penalty areas and the centre circle
Sports

Football

Offside, fouls, cards, penalties and set pieces, explained simply.

Read the guide
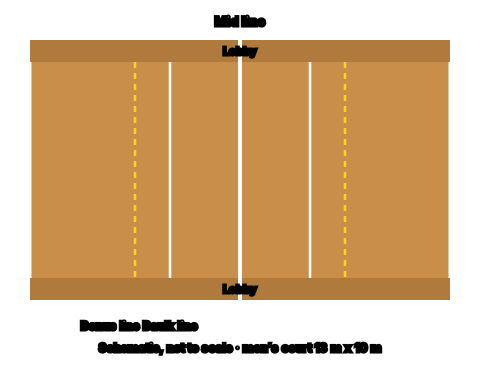
Kabaddi court with mid line, baulk lines, bonus lines and lobbies
Sports

Kabaddi

Raids, touch and bonus points, tackles, super tackles and all outs, explained simply.

Read the guide
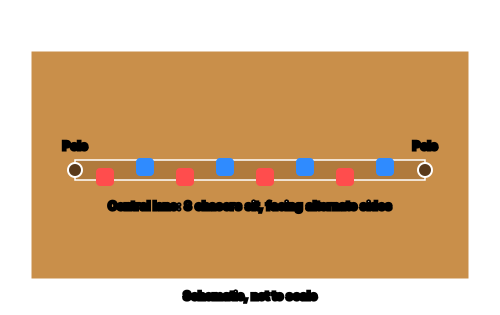
Kho-kho field with two poles and eight chasers sitting in the central lane
Sports

Kho-Kho

Chasers and runners, the “kho”, the poles and scoring, explained simply.

Read the guide
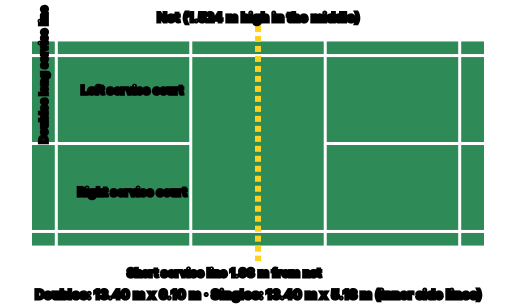
Badminton court with singles and doubles lines
Sports

Badminton

Scoring (including the new 15-point games), serving, the court and faults.

Read the guide
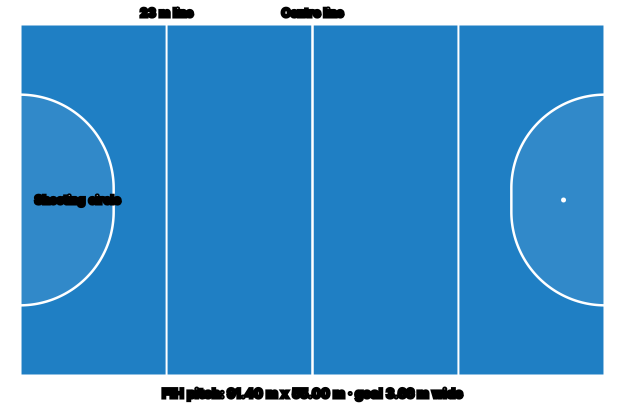
Hockey pitch with shooting circles and 23-metre lines
Sports

Hockey

Players, quarters, the shooting circle, penalty corners and cards, explained simply.

Read the guide
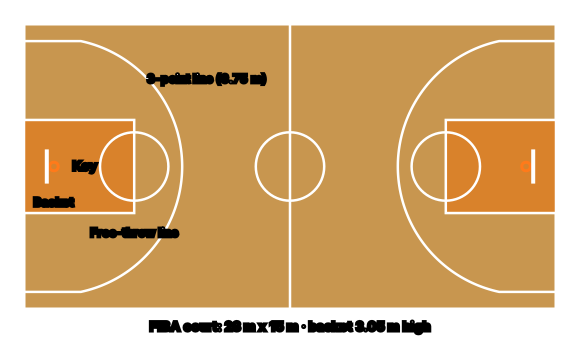
Basketball court with the key and three-point lines
Sports

Basketball

Scoring, dribbling, time rules, fouls and free throws, explained simply.

Read the guide
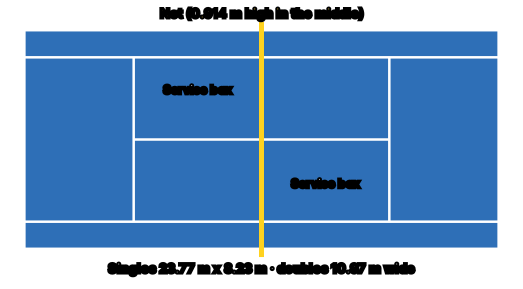
Tennis court with singles and doubles lines and service boxes
Sports

Tennis

Points, games, sets, tie-breaks and the serve, explained simply.

Read the guide
Volleyball court with the net and attack lines
Sports

Volleyball

Scoring, three touches, rotation and the libero, explained simply.

Read the guide

Time for a game?

Ludo, Snakes & Ladders and quick games like Tic-Tac-Toe, free in your browser.

Play free games